Friday, January 4, 2013

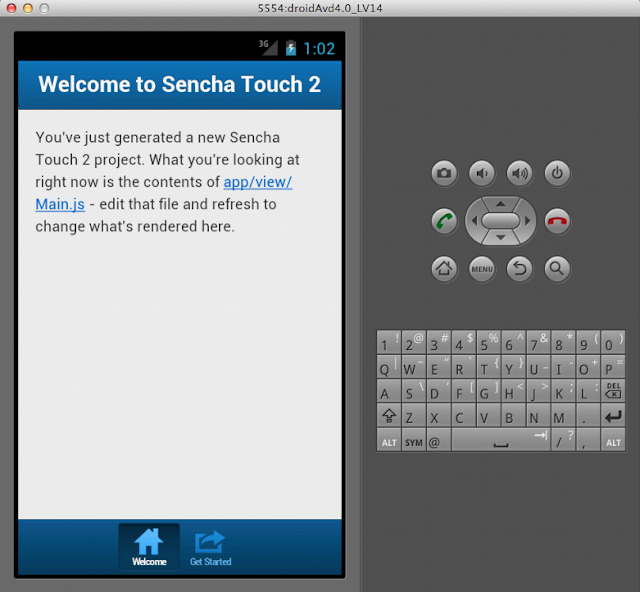
DemoApp Sencha Touch 2.1 + PhoneGap 2.2.0 + Android

As promised in my previous post, I will demonstrate how easy it is to access the camera of your Android device with PhoneGap's Camera API.

Prerequisites:

  • You have successfully completed the tutorial in my previous post and you have your packaged app running on your Android device OR your Android emulator.
  • You already have your own Sencha Touch app and you just need to access the camera for your device.
Generating a Sencha Touch app provides you with an app folder which contains five other folders(controller, model, profile, view, store, view). A Main.js file has already been created for you in the view folder. Now we need to create a Controller for our app where we will store all our logic.
In the root of your app's folder run the following command in Terminal.app:

sencha generate controller MainController
 Your app folder should then look like this:
    Now lets modify our Main.js. Replace the code in you Main.js file with the following code.
    NB: The name of my app is "DemoApp" so replace all instances of "DemoApp" in the code with the name of your app.
    Ext.define('DemoApp.view.Main', {
        extend   : 'Ext.tab.Panel',
        xtype    : 'main',
        requires : [
            'Ext.TitleBar',
            'Ext.Img'
        ],
        config   : {
            tabBarPosition : 'bottom',
    
            items : [
                {
                    xtype   : 'container',
                    iconCls : 'home',
                    title   : 'Home',
                    items   : [
                        {
                            xtype  : 'titlebar',
                            docked : 'top',
                            title  : 'DemoApp',
                            items  : [
                                {
                                    xtype    : 'button',
                                    itemId   : 'deleteBtn',
                                    iconCls  : 'delete',
                                    align    : 'right',
                                    iconMask : true,
                                    ui       : 'decline',
                                    action   : 'delete',
                                    hidden   : true
                                }
    
                            ]
                        },
                        {
                            xtype    : 'button',
                            text     : 'Take photo',
                            itemId   : 'photoBtn',
                            margin   : '5 10 0 10',
                            iconMask : true,
                            ui       : 'confirm',
                            action   : 'capture'
                        },
                        {
                            xtype  : 'container',
                            layout : 'fit',
                            margin : '10 0 0 0',
                            itemId : 'imgContainer',
                            items  : [
                                {
                                    xtype  : 'image',
                                    itemId : 'img',
                                    height : 400
                                }
                            ]
                        }
                    ]
                }
            ]
        }
    });
    
    Lastly, lets modify our MainController.js by replace the code in MainController.js with the following code.
    NB: The name of my app is "DemoApp" so replace all instances of "DemoApp" in the code with the name of your app.
    Ext.define('DemoApp.controller.MainController', {
        extend : 'Ext.app.Controller',
    
        config : {
            control : {
                "button[action=capture]" : {
                    tap : 'capturePhoto'
                },
                "button[action=delete]"  : {
                    tap : 'deletePhoto'
                }
            },
    
            refs : {
                photoBtn     : '#photoBtn',
                Img          : '#img',
                deleteBtn    : '#deleteBtn',
                imgContainer : '#imgContainer'
            }
        },
    
        deletePhoto : function () {
            var me = this,
                img = me.getImg(),
                deleteBtn = me.getDeleteBtn();
    
            img.destroy();
            me.createImg(); //replace destroyed img component
            deleteBtn.setHidden(true);
        },
    
        // function to replace destroyed image
        createImg   : function () {
            var me = this,
                imgContainer = me.getImgContainer(),
                img;
    
            img = {
                xtype  : 'image',
                itemId : 'img',
                height : 400
            };
    
            imgContainer.add(img);
        },
    
        capturePhoto : function () {
            var me = this,
                pictureSource, // picture source
                destinationType, // sets the format of returned value
                deleteBtn = me.getDeleteBtn(),
                photoComponent = me.getImg();
    
            // Wait for Cordova to connect with the device
            document.addEventListener("deviceready", onDeviceReady, false);
    
            // Take picture using device camera and retrieve image as base64-encoded string
            navigator.camera.getPicture(
                onPhotoDataSuccess,
                onFail, {
                    quality : 50, destinationType : destinationType.DATA_URL
                });
    
            /*-------------- Helper Functions -------------- */
            function onDeviceReady () {
                pictureSource = navigator.camera.PictureSourceType;
                destinationType = navigator.camera.DestinationType;
            }
    
            function onPhotoDataSuccess (imageData) {
                var imgSrc = 'data:image/jpeg;base64,'.concat(imageData);
    
                photoComponent.setSrc(imgSrc);
    
                //hide delete button
                deleteBtn.setHidden(false);
            }
    
            // Called if something bad happens.
            function onFail (message) {
                alert('Failed because: ' + message);
            }
        }
    });
    Finally run the following command to build and package your app onto your Android device or emulator.
    sencha app build package && build/DemoApp/android/cordova/debug
    
    NB: Again, replace "DemoApp" with the name of your app.


    Video

    Your app should work like the one in the video.


    All done! Have fun with your app :).

    Thursday, January 3, 2013

    Sencha Touch 2.1 + PhoneGap 2.2.0 + Android

    This post aims to provide a guide for anyone who wants to package a Sencha Touch 2.1 app with PhoneGap(Cordova) 2.2.0 for Android.

    What You need:

     - Sencha Touch 2.1
     - Android SDK
     - Sencha Cmd 3.0 (For Mac)
     - PhoneGap 2.2.0

    Assuming you have Sencha Cmd and Android SDK installed, we can now begin creating our app.

    Open your Terminal.app and cd into your Sencha Touch 2.1 directory:
    cd path/to/sencha-touch-2.1/directory
    Create a new Sencha Touch app. I will name my app MyApp for this tutorial:
    sencha generate app MyApp path/to/MyApp
    
    After your app has been generated, cd into you new app's folder:
    cd path/to/MyApp
    
    Now copy the cordova-2.2.0.js file from your PhoneGap directory to the root of your Sencha Touch app:
    cp path-to-phonegap-directory/lib/android/cordova-2.2.0.js ./
    
    We now have to ensure that we include the path of the cordova-2.2.0.js file in our app.json which was generated for us. So, go ahead and open up app.json in your favorite editor and place the path to the cordova-2.2.0.js file like so:


    Before you continue, make sure you set your PATH variable to include both the Android tools directory and the platform-tools directory. If you haven't done so, run the following command in your Terminal.

    vim ~/.bash_profile
    
    Copy and paste the following lines in your .bash_profile ensuring that you set the correct path to your Android SDK.
    export PATH=${PATH}:path-to-android-sdk/tools
    export PATH=${PATH}:path-to-android-sdk/platform-tools
    
    After you have done this, create a new Android project using PhoneGap.
    cd path-to-phonegap-directory/lib/android/bin
    
    ./create path-to-MyApp/build/MyApp/android com.example.myapp MyApp
    Return to the root folder of your Sencha Touch app:
    cd path/to/MyApp
    
    You will notice the build folder that was created after creating the android project using PhoneGap.
    You will notice a build.xml file in the root of your app's folder. Open this file with your favorite editor, and place the following code just above the comments.


    Your final build.xml file should look like this:

    The Light At The End Of The Tunnel 


    To test out your Super Cool app, ensure that:
      • You are in the root of your app's folder 
      • Your phone is plugged into you computer OR your Android emulator is running
      Now run the following command: 
      sencha app build package && build/MyApp/android/cordova/debug


      DONE!!!

      My next post will be about a simple DemoApp (Android) which uses PhoneGap's Camera API for camera access.